Chalk paint isn’t durable as the paint is water-based and has a simple formula with no protective additives. So, how to seal chalk paint?
To seal chalk paint, use wax, lacquer, polyurethane, or varnish sealer. A sealer coating will produce a transparent glossy water-resistant coating over the paint and protect it from water, moisture, scratches, and outdoor weather elements.
Ensure to clean and sand chalk paint finish with fine-grit sandpaper (220-grit) or extra fine-grit sandpaper (440-grit) before sealing it.
Does Chalk Paint Need A Sealer?
Chalk paint needs a sealer if you apply it outdoors or over surfaces that are exposed to constant water or handling.
A sealer coating will produce a glossy water-resistant or waterproof layer over the paint and protect it from water, scratches, handling, and outdoor weather elements.
Chalk paint isn’t durable as the paint is water-based, doesn’t have a glossy topcoat, and doesn’t have protective additives on its formula. The paint will get removed if exposed to constant water or handling.
The reasons you must apply a sealer over chalk paint are listed below.
- It Produces a Reflective Finish. Unsealed chalk paint has a dull textured finish, but a sealer will produce a reflective and glossy finish over it.
- Protect it from Dirt and Stains. A water-resistant sealer will protect chalk paint from dirt, stains, water rings, and grime.
- Makes Chalk Paint Waterproof. A waterproof sealer will make chalk paint waterproof and protect it from water and weather elements, such as rainfall.
- Offers Weather Protection. An exterior sealer will protect a chalk paint finish from weather elements, such as rainfall or UV rays.
- Increases Durability. Sealed chalk paint will last more than unsealed chalk paint. Also, you can touch up the sealed finish by applying one (1) coat of sealer every few years.
How Long Must Chalk Paint Dry Before Sealing?
Chalk paint must cure (fully dry) for about 24 hours before sealing it. The exact dry or cure time depends on the room temperature and humidity, and the number of paint coats.
For the paint to cure, the solvent (water) must evaporate, and the coating must become rigid and polymerize (or cross-link). Once the chalk paint cures, it reaches its maximum durability, hardness, and adhesion.
If you seal chalk paint too soon, the sealer coating will decrease the evaporation rate of the paint solvent (water), and the paint solvent (water) will prevent the paint from drying and the sealer from adhering or drying, creating a sticky, tacky, or blotchy finish.
How To Seal Chalk Paint?
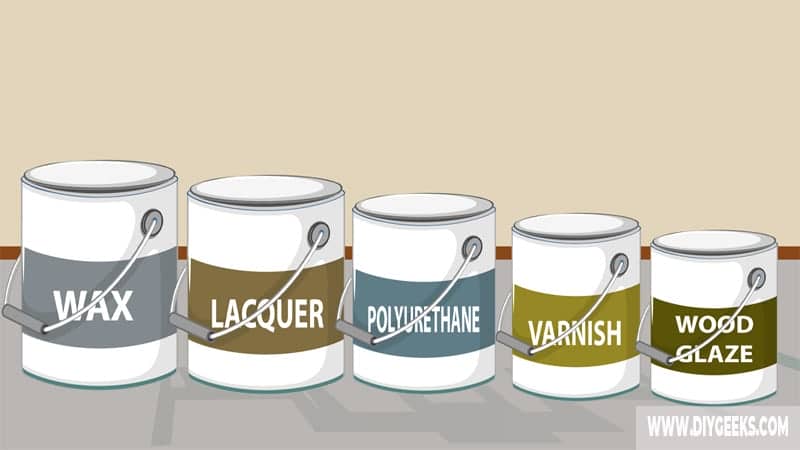
To seal chalk paint, use one of the following sealers.
- Wax
- Chalk Lacquer
- Polyurethane
- Varnish
1. Use Wax
Wax is a sealer used to protect surfaces painted with chalk paint. Wax creates a protective top coat over chalk paint and protects it from water, moisture, scratches, and other damage.
There are two main types of wax used with chalk paint: dark and clear wax. Clear wax will produce a transparent top coat over the paint and won’t affect the color shade of the finish. Dark or colored wax is tinted with paint pigments and will produce a colorful durable top coat over paint and change the finish color shade.
Chalk paint must dry for 24 hours before applying wax, and wax must dry for two (2) weeks before you can use painted material.
To seal chalk paint with wax, do the following things.
- Sand chalk paint with fine-grit sandpaper (220-grit).
- Remove dust using a dust cloth or vacuum.
- Prep the wax sealer in an open container.
- Wipe the wax over the finish using a lint-free cloth. Work in sections and cover every area of the surface.
- Leave the first coat to dry for about an hour and then apply the next coating.
- Wipe off excess wax with a cloth.
- Leave the wax to dry for 24 hours before polishing or buffing.
- Leave the finish to cure for about 2 weeks before subjecting it to regular use.
The advantages of using a wax sealer are listed below.
- It compliments the rustic appearance of chalk paint.
- It deepens its color.
- Hides imperfections and blemishes on the surface.
- It’s water-resistant.
The disadvantages of using a wax sealer are listed below.
- Slow dry time.
- You need to occasionally touch up and re-apply it because it doesn’t last very long.
2. Use Lacquer Sealer
A lacquer sealer is a clear finishing product used to protect paint and the appearance of different surfaces.
Compared to wax, lacquer sealer offers better durability and protection as it’s formulated with extra protective additives. You can apply lacquer sealer with a paintbrush and it dries fast.
To seal chalk paint with lacquer sealer, do the following things.
- Sand the paint finish with fine-grit sandpaper (220-grit).
- Remove dust and wipe the surface.
- Ensure the finish is smooth as lacquer sealer doesn’t hide imperfections on the surface.
- Prep the lacquer sealer by stirring it.
- Apply two (2) lacquer sealer coats with a bristle paintbrush.
- Wait 2 hours between coats.
- Buff the first coat with extra fine-grit sandpaper (440-grit) before applying the second coat.
- Wait 24 hours for the lacquer sealer to cure.
The advantages of using a lacquer sealer are listed below.
- Dries fast (15 minutes at room temperature).
- Last for years before there is any sign of damage.
- Lacquer is water-resistant.
- You can use it from the container.
- It is formulated with UV blockers.
The disadvatanges of using a lacquer sealer are listed below.
- Moisture and contaminants can affect and ruin a lacquer finish.
- Lacquer can develop bubbles, fish-eye, and orange discoloration if it isn’t applied correctly.
3. Use Polyurethane
Polyurethane is a sealer made by mixing different sealers, additives, resins, and solvents. The sealer forms a transparent glossy water-resistant coating over paint and protects it from moisture, water, scratches, and weather elements.
There are two types of polyurethane; water-based and oil-based. Water-based polyurethane dries faster but has a lower durability compared to oil-based polyurethane.
For outdoor chalk paint surfaces, use oil-based or exterior polyurethane, and for indoor paint surfaces, use water-based polyurethane.
To seal chalk with polyurethane, do the following things.
- Sand the paint finish with fine-grit sandpaper.
- Remove dust using a vacuum.
- Prep the polyurethane by shaking the container and stirring the sealer.
- Apply the first polyurethane coat with a sprayer, rag, or brush.
- Wait until the first coat dries before sanding it with extra fine-grit sandpaper (440-grit). Water-based polyurethane takes around 6-8 hours to dry between coats, and oil-based polyurethane takes around 24 hours to dry between coats.
- Add the next additional coatings to increase the durability.
- Leave the polyurethane to cure.
The advantages of using a polyurethane sealer are listed below.
- It is easy to apply and can be applied with a roller, spray gun, or paintbrush.
- It protects against all types of scratches and dents.
- Water-based polyurethane doesn’t turn yellow.
The disadvantages of using a polyurethane sealer are listed below.
- Oil-based polyurethane turns yellow after a few months
4. Use Varnish Sealer
Varnish is a sealer that creates a water-resistant coating over painted surfaces and protects them from water, moisture, and other elements.
To seal chalk paint with varnish, do the following things.
- Prep the paint finish by cleaning and sanding it with extra fine-grit sandpaper (440-grit).
- Thin varnish with 10% mineral spirits.
- Apply the first coat of varnish with a bristled paintbrush.
- Leave the varnish to dry for 2-4 hours before recoating. In humid conditions, wait about 12 hours before recoat.
- Leave the finish to dry and cure. This can take up to 72 hours.
The advantages of using a varnish sealer are listed below.
- It is tough and durable.
- It makes the chalk paint water-resistant.
- When dry, it provides a glossy finish that can highlight the finish underneath.
- Varnish lasts very long (10-20 years)
The disadvatanges of using a varnish sealer are listed below.
- Not all varnishes are suited to outdoor use as it tends to discolor when exposed to direct sunlight
- It is prone to dust build-up and can be difficult to clean without a solvent
Things To Know
Can You Leave Chalk Paint Unsealed?
You can leave chalk paint unsealed if you apply it over indoor low-traffic or decorative surfaces.
Low-traffic or decorative indoor surfaces aren’t exposed to constant water, moisture, or handling, so the paint will last longer without a sealer.
For instance, you can apply chalk paint over picture frames without sealing it and the paint will last longer as it won’t be exposed to elements that can remove it.
You can’t leave chalk paint unsealed if you apply it over outdoor or high-traffic indoor surfaces. Chalk paint can’t protect outdoor surfaces that are exposed to constant water, dust, and rainfall.
Chalk paint formula consists of binders (or plasters), paint solvent (water), and paint pigments (colorants). None of these additives make the paint durable.
Do You Need To Sand Chalk Paint Before Sealing It?
You don’t need to sand chalk paint before sealing it if the paint finish doesn’t have imperfections and bumps and is freshly applied.
You need to sand chalk paint with extra fine-grit sandpaper (440-grit) or fine-grit sandpaper (220-grit) if the paint finish is riddled with imperfections, dust, dirt, or bumps.
The purpose of sanding is to remove imperfections, dust, dirt, and bumps from the paint finish and make it ready for the next paint or sealer coating.
Don’t sand chalk paint before sealing with coarse or medium-grit sandpaper as it will remove the entire finish.
Which Sealers Should You Avoid?
Avoid water-based sealers for outdoor chalk paint surfaces as these sealers aren’t durable enough to protect the paint from weather elements, such as rainfall.

