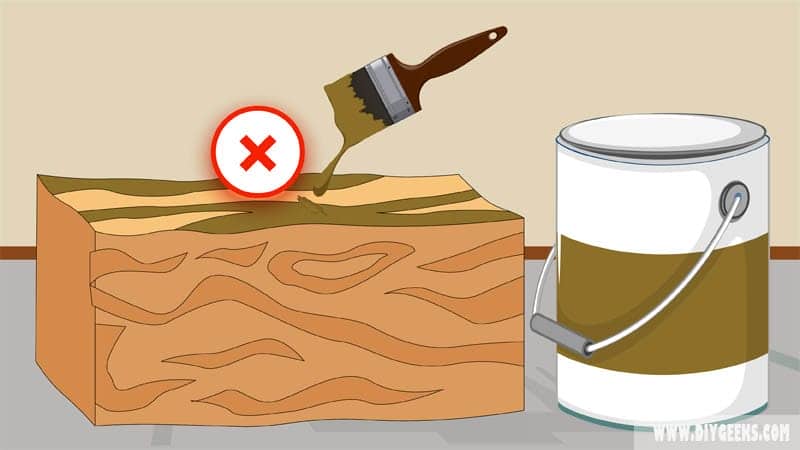
Wood won’t accept wood stain if it’s a fake wood, the wood is sealed, the surface pores are clogged, it’s softwood or exotic wood, or if the wood is wet (damp).
To make the wood absorb more wood stain, use gel stain, apply thin coats, power wash the surface, and use back brushing.
Note: Ensure that the wood is natural and not synthetic (fake). Fake woods aren’t porous and don’t accept wood stains.
Why Won’t Wood Accept Wood Stain?
Wood won’t accept wood stain for the following reasons.
- It’s a Fake Wood.
- The Wood is Sealed.
- Surface Pores are Clogged.
- It’s a Softwood or Tight-Grained Wood.
- It’s an Exotic Wood.
- Wet Wood
1. It’s a Fake Wood
Fake (or synthetic) wood doesn’t absorb any liquid (including wood stain). You can use wood stain only on natural or real wooden surfaces as they allow penetration in their pores.
Real wood is porous, meaning it allows water and air to penetrate its pores, and as such it can be stained.
Fake wood isn’t porous because it doesn’t have pores. It’s man-made and contains synthetic materials that make its surface waterproof. Since it’s not porous, it doesn’t absorb wood stains.
Many people can’t tell the difference between real and fake wood because manufacturers make them look and feel the same.
To tell the difference between fake and real wood, do the following things.
- Check the weight – Natural wood is heavier.
- Are there carvings on the surface? – This means it is real wood. Fake wood like Veneer and Laminate can’t be carved.
- Inspect the pattern – Real wood would have an irregular grain pattern but fake wood has the same grain pattern repeated throughout the entire surface.
How to fix?
Unfortunately, there is nothing you can do to fix this. If it’s not real wood, it can’t be stained. An alternative to try out is to paint it, as paint doesn’t need to penetrate a surface to stick.
2. The Wood is Sealed
You can’t stain a sealed surface as its topcoat will prevent the wood stain from penetrating it. A sealer produces a moisture-resistant (or waterproof) coating over a surface and covers its pores so it doesn’t absorb moisture.
A sealed surface won’t accept a new finish until you remove the topcoat.
To know if a surface is sealed, do the following things.
- Point a flashlight to it. – Does it look shiny? If yes, it’s sealed.
- Sand lightly with fine sandpaper – While sanding, do you see sawdust or clear coat shaving? If you see sawdust, there is no sealer. If you see clear coat shaving, the surface is sealed.
- Sprinkle water over it – If the water is absorbed after a few minutes, there’s no sealer. If the water remains on top of the surface after a few minutes, there’s a sealer.
How to Fix?
To fix this, remove the sealer coating from the surface by sanding it off or using a paint stripper.
To sand it off, use 80-180 grit sandpaper to abrade the surface. For large surfaces, use a random orbital sander.
After sanding for a few minutes, inspect the surface to see if the sealer coat is off. Once you start seeing sawdust, stop sanding because you have removed the sealer.
To strip the sealer off, use CitriStrip or any other paint stripper but ensure the stripping compound is compatible with wooden surfaces. Some chemical and solvent-based strippers can damage the wood, so stay away from them.
Follow the manufacturer’s instructions to know how to use the paint stripper. If you are using CitriStrip, apply thick coats on the surface and leave for 30 minutes before scraping it off with a paint scraper.
3. Surface Pores are Clogged
Sanding too much or using ultra-fine sandpaper can clog the pores of a wooden surface.
Ultra-fine sandpaper produces tiny sawdust that will clog up (fill) the pores of the surface. Since the pores are full, they can’t absorb the wood stain.
How To Fix?
To fix this, sand the surface with fine-grit sandpaper (150-180 grit). This sandpaper isn’t too rough to damage the wood and will open the pores. Sand for a few minutes and remove the dust before applying stain.
Or, clean the surface with a damp cloth but this works only for a small amount of sawdust and small surfaces.
4. Softwood or Tight-Grained Wood
Wood stains can’t penetrate softwoods, such as Cedar, Spruce, Pine, and Fir, as they have tight pores and are non-porous.
The finish will appear blotchy or uneven if you apply wood stain over softwoods. Some hardwoods, such as Maple, also have tight pores (or grains).
How To Fix
The best option for tight-grained or small pores surfaces is to use paint or a non-penetrating stain, such as Gel stain or Polyshades. These finishes sit on the top layer of the surface and stick without needing to penetrate it.
Another alternative is to use medium-grit sandpaper to graze the surface of furniture. Doing this will create tiny openings for the stain to be absorbed through. However, doing this doesn’t guarantee a smooth finish.
Note: Wood conditioner doesn’t improve stain absorption, it’s a false claim! The conditioner is an undercoat that reduces stain penetration, especially in softwood. It is used to ensure a smooth and even finish by reducing the amount of stain the wood needs to absorb.
5. Exotic Wood
Exotic woods, such as Teak, Bloodwood, or Cumaru, contain oils, saps, and juices that prevent them from absorbing wood stains.
For instance, Teak wood contains high levels of oils and is used to produce Teak oil. As such, any oil-based stain that is used over it will be repelled.
Also, you can’t apply water-based stains over it as it’s not compatible with oil. Bloodwood also has red juices in it that give it its distinct color. Its fluid makes it difficult for it to absorb any stain.
How To Fix
Unfortunately, there is little you can do to change this. Your best bet is to use a non-penetrating stain like Gel stain or Polyshades. Since these stains don’t need to penetrate a surface to stick, you are good to go.
Another alternative is not to stain them at all. Exotic woods have distinct features that make them beautiful. As such, woodworkers often leave their natural look and seal them with polyurethane or varnish to protect them from damage.
6. Wet Wood
Wet (or damp) woods have their pores filled with water, so the wood stain has no space to penetrate. You must wait until the wet wood dries before staining it.
How To Fix
The only way to fix this is to leave the surface to dry fully.
7. Only a Part Of The Wood is Accepting Stain
If only a wooden part is absorbing the wood stain, something is blocking the other parts from absorbing it. A rotted wood won’t accept stains well, so if that’s the case you must replace the rotted parts.
A leftover finish, glue, or blocked pores can prevent wood from absorbing wood stain on one part. Sanding the wood parts that are blocked or using non-penetrating wood stain will fix the problem.
How To Make Wood Absorb More Wood Stain?
To make wood absorb more wood stain, do the following things.
- Use Gel Stain.
- Apply Thin Coats.
- Power Wash the Surface.
- Use Back brushing.
1. Use Gel Stain
Use topical or non-penetrating stains over surfaces that don’t accept wood stains well. Topical stains don’t need to penetrate a surface to stick, they can stay over the top layer and dry. They are perfect for tight-grained surfaces.
You can apply a sealer, such as shellac-based sealer, before applying Gel stain to improve adhesion.
2. Apply Thin Coats
Thin wood stain coats have a better absorption rate, especially on tight-grained surfaces. Thick coats take longer to be absorbed.
So, thin wood stain before applying it to make its coating lighter or thinner.
3. Power Wash The Surface
Power washing will remove glue, dust, dirt, mill glaze, or sticking elements that are still on the surface and prevent the wood stain from penetrating.
To power wash a wooden surface, connect it with a garden hose and wash it. Wait until the wood fully dries before staining it.
You can sand the surface with fine-grit sandpaper as an alternative to power washing.
4. Use Back-brushing
Back-brushing is a technique used by woodworkers to make the stain penetrate deep into the pores. Immediately after applying the stain, use a wide brush to massage the wood stain into the wood. Do this after each coat, so the stain is absorbed deeply.
Ensure to wipe off the excess wood stain after to prevent a gunky finish.

