
Semi-gloss paint is known for its glossy finish and high amount of sheen.
You need to sand between semi-gloss paint coats to remove the glossy layer that can prevent proper paint adhesion.
You don’t need to sand the final paint coating, but you need to sand before applying the paint.
How Long Must Semi-Gloss Paint Dry Before Sanding?

Semi-gloss paint must dry for around 2-3 hours before sanding it. The exact dry time depends on the room temperature and humidity, coat viscosity, and surface type.
The paint coating when dry becomes hard (or rigid) enough to withstand the sandpaper abrasive side.
Semi-gloss paint dries through evaporation — the paint solvent must evaporate fully and the coating must become hard (rigid) for the paint to dry. The paint dries faster if the temperature is higher than 50°F (10°C) and humidity is lower than 50% as the paint solvent evaporates faster.
If you sand semi-gloss paint too soon, the paint finish will get damaged, ruined, or removed and the sandpaper will clog because the coating won’t be hard (or rigid) enough to withstand sanding.
Do You Need To Sand Between Semi-Gloss Coats?
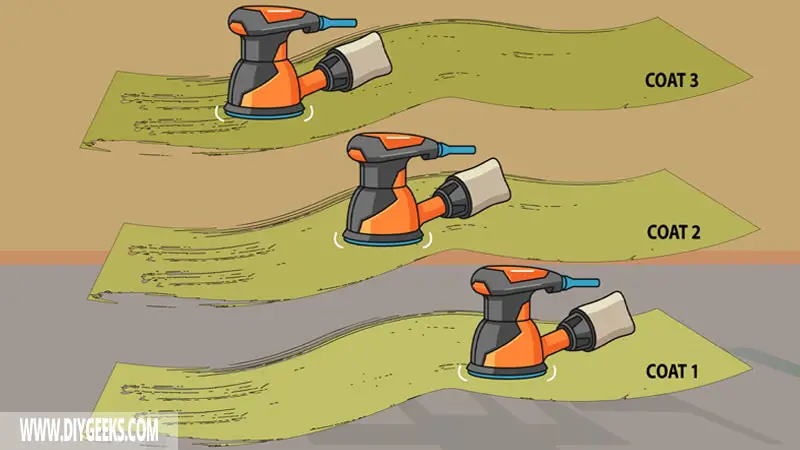
You need to sand between semi-gloss paint coats to remove its glossy finish and create tiny pores (holes) to improve paint adhesion.
Semi-gloss paint is formulated with high amounts of sheen (gloss) and creates a glossy moisture-resistant top layer that prevents paint penetration or adhesion.
If you don’t sand between semi-gloss paint coats, the new coat won’t adhere well and can peel off from the surface.
To sand between semi-gloss paint coats, use fine-grit sandpaper (220-grit). Fine-grit sandpaper removes the glossy topcoat but can’t remove the entire finish.
Don’t use coarse or medium-grit sandpaper to sand between coats as it can remove the entire paint finish.
Do You Need To Sand The Final Semi-Gloss Paint Coat?
You don’t need to sand the final semi-gloss paint coat because you will remove the protective glossy water-resistant coating.
The final semi-gloss paint coating is the protective layer that protects the surface from moisture, water, scratches, and other elements. If you remove the final protective coating, the underlying surface won’t be protected.
Do You Need To Sand Before Applying Semi-gloss Paint?
You need to sand before applying semi-gloss paint to remove surface imperfections, bumps, and stains, and improve paint adhesion. Sanding is an essential step for surface prepping before painting.
Most surfaces are riddled with imperfections, bumps, stains, dirt, and dust. If you apply paint directly over these surfaces, the imperfections will prevent the paint from penetrating or adhering properly.
You must sand before applying semi-gloss paint if the surface is already finished with a sealer or oil-based paint. The sealer or oil-based paint will prevent the semi-gloss paint from adhering if you don’t remove or sand them off.
To sand before applying semi-gloss paint, use medium-grit sandpaper (100-grit) for surfaces in good condition and coarse-grit sandpaper (40-grit) for surfaces riddled with imperfections.
What Sandpaper Grits To Use?
To sand between coats of semi-gloss paint, use fine-grit sandpaper (220-grit and higher).
To sand before applying semi-gloss paint, use medium-grit sandpaper 100-grit for surfaces in good condition and coarse-grit sandpaper (40-grit) for surfaces with imperfections.
The higher the sandpaper grit number, the less abrasive it is and the more it smoothens the surface. The lower the sandpaper grit number, the more abrasive it is and the faster it removes paint.
The sandpaper grits are listed below.
- Coarse-grit sandpaper (40-grit).
- Medium-grit sandpaper (100-grit0.
- Fine-grit sandpaper (220-grit).
- Extra fine-grit sandpaper (440-grit or higher).

